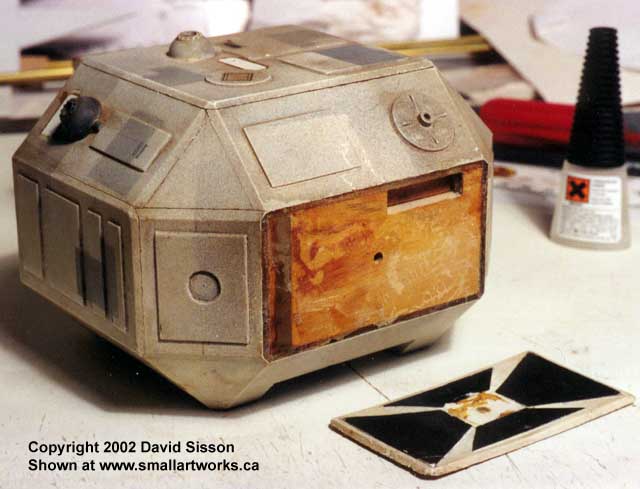
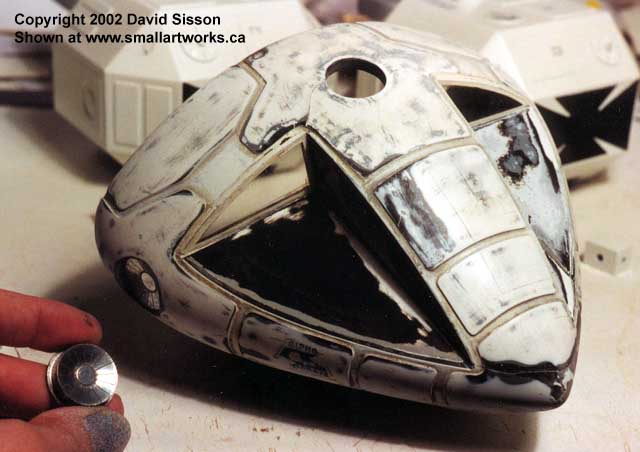
Rear right pod being repaired. The Gemini
kit part on the left side (dark gray hemisphere) had been added by the
last owner who thought it had dropped off, however the rear two pods never
featured these kit parts on the back panels. This confusion was caused
because the pods were occasionally swapped round at the studio, possibly
by a technician who just forgot which way round they went. For example
in the 2nd season publicity shot of the spaceships in the volcano (The
Metamorph) the front left and rear right pods have been swapped round while
in later episodes 'The Bringers of Wonder' it's the front right and rear
left that have switched.
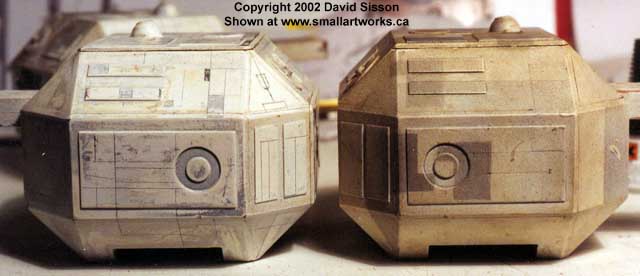
When I stripped the pods and identified
the underlying detail I found that the front right and rear left have been
swapped over for probably the last 20 years, but this might have been deliberately
done because the front and top panels of the leading pod had been burnt
and looked a mess.

Careful sanding
reveals original paint work underneath.
The pods appeared to be covered by about
nine layers of paint. Before applying any new paint I decided to remove
the outer layers (which mostly consisted of dirty grey and white primer)
using very fine wet and dry paper to uncover the original detailing and
give me a decent clean surface. This was a reasonably easy task for the
flat-sided panels but the kit parts were a problem, some of them were covered
in so much paint that they were loosing all the detail. It did cross my
mind to simply replace the worst ones with new parts but what's the point
of having something original if you're going to throw a lot of bits away!
In the end I did manage to clean up the parts reasonably well although
one of the circular Saturn 5 bits was so bad that I was forced to replace
it.
The cleaning process uncovered a lot of
panel lines, grey painted panels and letraset decals. The faint lines were
highlighted and reference photographs taken from all angles so that they
could be recreated later. Although the letraset decals were a bit damaged
I decided it would be nice if I could save some of them so I
covered the best in masking tape during the painting stage and now they're
part of the finished model. Also I applied each new layer of paint quite
thinly so that I could see the underlying panel lines and trace them through.
The undercarriage units were stripped down
and given a little cleaning but I liked the used and slightly grubby look
and decided to leave them as they were. The right rear leg has been damaged
in the past and some rusty poor fitting bolts had been fitted, which I
replaced, but it still works well enough.
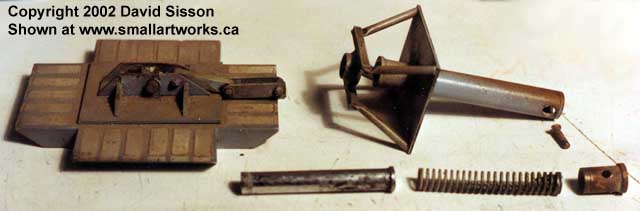
The only problem with this area is a design
flaw where the small scissor action supports behind each leg keep breaking
where they connect at the top. This is caused by the twisting action of
the oleo strut or when the model is lifted up, the strut drops, straightening
the support, which then doesn't bend when the model is put down again.
To combat this the oleos on the 2nd 44 inch model have a stud on the side
which runs up a slot in the support tube that keeps the strut in line and
on the 3rd model the support is firmly bolted to a plate surrounding the
leg.
As the engine section is a lot heavier
than the hollow nosecone the Eagle does tend to sag down a lot at the back
end. To fix this I put some plastic blocks inside the rear leg tubes to
compress the springs and level it out.
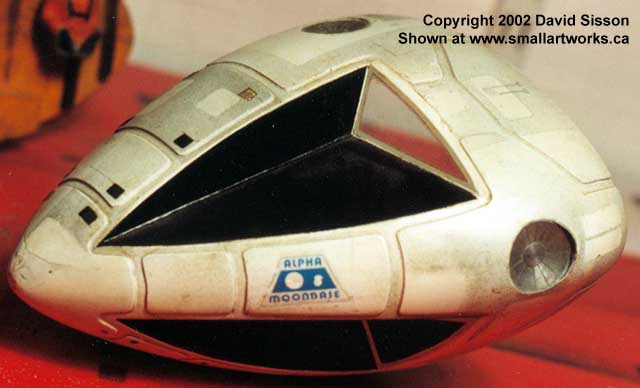
The front section of the nosecone is moulded
in clear perspex (split top & bottom) a thinner layer of the same material
is also used to form the raised panelling and the inside has been sprayed
black to prevent any interior illumination from leaking out. An interesting
note is that the lower 'windows' have only been painted black on the outside,
which would seem to indicate that the original model maker probably misinterpreted
the blueprint and built the beak with four clear windows.
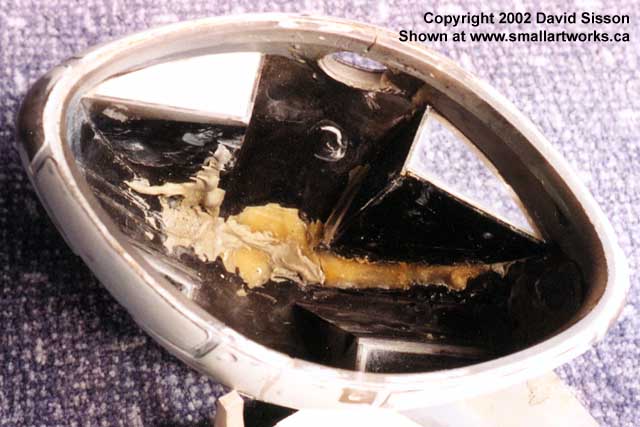
Although there was a crack evident across
the front of the beak I didn't realise just how bad it was until after
I'd finished cleaning off the upper layers of paint. At some point in the
past the model had sustained a heavy blow to the nose that has broken off
the very tip and split the upper half of the nosecone almost in two. The
crack starts at the attitude thruster hole in the top, runs down the right
hand window recess, across the bridge of the nose then back up the left
hand side window recess almost back to the starting point - only one centimetre
of unbroken perspex still holds the two pieces together plus a large lump
of filler and epoxy glue that someone has spread along the inside.
There are also a number of areas where
the paint has been previously stripped off right down to the perspex, possibly
due to the actions of the chemical TTC that was applied to create smoke
during the episode 'The Bringers of Wonder'.
One surprise was uncovering the original
painted panel detailing and discovering that they were light blue and not
grey like the rest of the model.
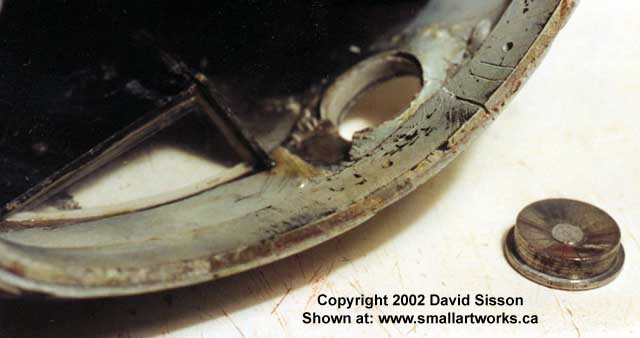
Close up of the attitude thruster turned
from aluminium. Each of the four parts was secured in place with filler
and scribed with T,B,L or R (no prizes for guessing what they stand for)
The damage to the nosecone had made the top one fall out and it had been
glued back in at the wrong depth so I had to move it.
Note the open edge of the nosecone has
been strengthened with an added band of perspex.
Continued...
|